
操作过程
1.安装环境
pip3 install pvcobra(成功)
pip3 install tencentcloud-sdk-python
结果速度极慢,去github下载包,https://github.com/TencentCloud/tencentcloud-sdk-python
1
sudo python3.10 setup.py install
ps:这个包依赖环境:Python 2.7, 3.6-3.9 版本。但我在电脑上试用时3.10也可以,先不管了。
以下请忽略,sb了 失败:
1
2
3
4
5
6
7
8
9
10
11
12
13
14
15
16
17
18
19
20
21
22
23
24
25
26
27
28
29
30
31
32
33
34
    Installed /usr/local/lib/python3.10/site-packages/tencentcloud_sdk_python-3.0.1011-py3.10.egg
    Processing dependencies for tencentcloud-sdk-python==3.0.1011
    Searching for requests>=2.16.0
    Reading https://pypi.org/simple/requests/
    Download error on https://pypi.org/simple/requests/: _ssl.c:980: The handshake operation timed out -- Some packages may not be found!
    Couldn't find index page for 'requests' (maybe misspelled?)
    Scanning index of all packages (this may take a while)
    Reading https://pypi.org/simple/
    error: The read operation timed out

这个错误是由于 Python 包管理工具 pip 试图下载 requests 包时出现连接问题导致的。在错误信息中,有两个主要的错误:

_ssl.c:980: The handshake operation timed out:这是一个与 SSL 连接握手时出现超时的错误,可能是由于网络问题导致的。

error: The read operation timed out:这个错误是因为 pip 在从 Python 包索引(PyPI)中读取数据时遇到超时。

不行,还是得安装其他的包,看来必须得把树莓派的网络搞好,不然今后安装环境都很麻烦

**树莓派开代理**

https://note.youdao.com/ynoteshare/index.html?id=f5629c0793c02c5b6388089ba9cb2eda&type=note&_time=1698474784224

注意的地方:
1. 3中的config.json在D:\v2rayN-With-Core\guiConfigs里


wgethttps://github.com/mzz2017/v2rayA/releases/download/v0.7.1.3/installer_debian_armhf_v0.7.1.3.deb
一般下载到/home/pi目录下,双击下载下来的deb即可安装部署web管理界面
docker run ‐‐name v2raya‐gui ‐d ‐‐restart=always ‐p 8080:80 mzz2017/v2raya‐gui
这是我们会遇到doker命令不存在,解决方案部署web管理界面,将下述替<port>换为任一本地端口即可
docker run ‐‐name v2raya‐gui ‐d ‐‐restart=always ‐p <port>:80 mzz2017/v2raya‐gui
安装v2ray-cora、下载v2ray-linux-arm,解压——之前尝试过很多都是64位无法使用b、创建目录mkdir/usr/bin/v2ray和mkdir/etc/v2rayc、使用mv[filename][path]将解压后的4个文件v2ray,v2ctl,geoip.dat,geosite.dat移至/usr/bin/v2rayd、将解压后的systemed/v2ray.service移至/etc/systemed/systeme、将win10导出的congfig.json发送到树莓派,并移动到/etc/v2rayf、给/usr/bin/v2ray/v2ray赋予执行权限:sudochmod+xv2rayg、查看配置文件是否出错/usr/bin/v2ray/v2ray-test-config/etc/v2ray/config.jsonh、启动/查看/开机自启动v2ray:sudosystemctlstart/status/enablev2ray启动v2ray
sudoservicev2raystart
六、登录WebUI在树莓派上访问localhost:<port>(将<port>替换为你之前设置的端口)进入WebUI,首次进入会提示你设置账户。点击设置,将全局透明代理改为大陆白名单即可代理上网。七、端口问题我们在win10上使用无线网卡,需要查看我们的路由端口确保端口不会被占用或被win10代理使用我推荐使用NSWport路由器端口映射工具先检查点击检测本机若冲突则修改
问题越搞越多,还是从源头解决,换个网络,安装tencentcloud-sdk-python
Installed /usr/local/lib/python3.10/site-packages/tencentcloud_sdk_python-3.0.1011-py3.10.egg Processing dependencies for tencentcloud-sdk-python==3.0.1011 Searching for certifi>=2017.4.17 Reading https://pypi.org/simple/certifi/ /usr/local/lib/python3.10/site-packages/pkg_resources/init.py:123: PkgResourcesDeprecationWarning: is an invalid version and will not be supported in a future release warnings.warn( Downloading https://files.pythonhosted.org/packages/4c/dd/2234eab22353ffc7d94e8d13177aaa050113286e93e7b40eae01fbf7c3d9/certifi-2023.7.22-py3-none-any.whl#sha256=92d6037539857d8206b8f6ae472e8b77db8058fec5937a1ef3f54304089edbb9 error: Download error for https://files.pythonhosted.org/packages/4c/dd/2234eab22353ffc7d94e8d13177aaa050113286e93e7b40eae01fbf7c3d9/certifi-2023.7.22-py3-none-any.whl#sha256=92d6037539857d8206b8f6ae472e8b77db8058fec5937a1ef3f54304089edbb9: [Errno 101] Network is unreachable
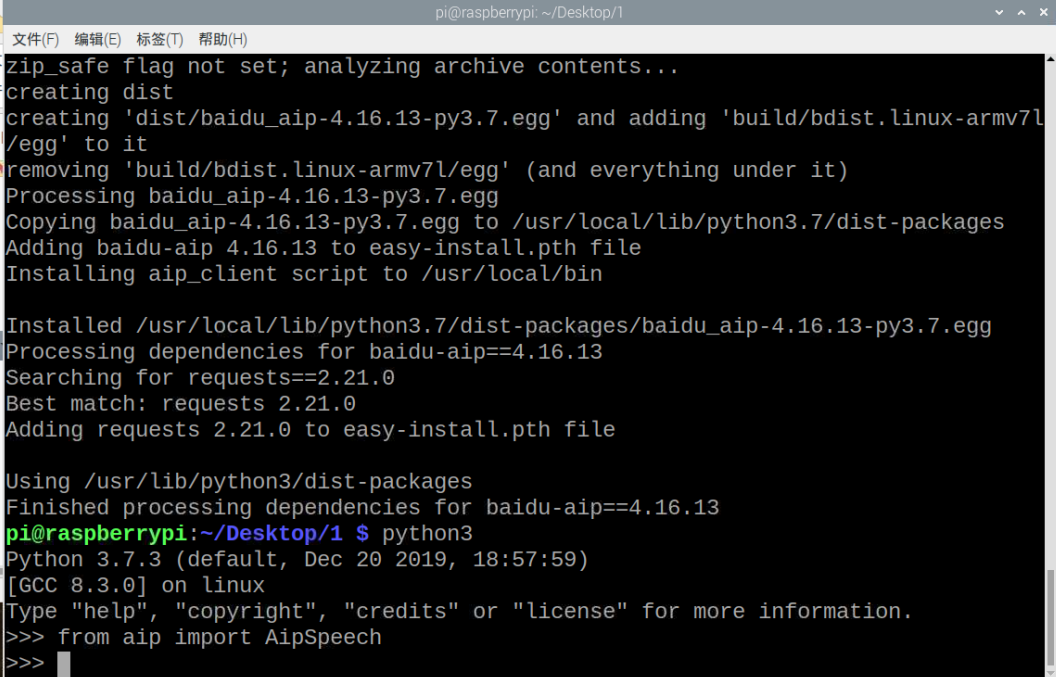
最后换了百度的语音识别,安装了他的SDK。
安装api所需的库
https://ai.baidu.com/sdk#asr
下载包到树莓派中,然后进入解压好的文件夹sudo python setup.py install即可
2023年10月29日10:59:34
1
2
3
4
5
6
7
8
9
10
11
12
13
14
15
16
17
18
19
20
21
22
23
24
25
26
27
28
29
30
31
32
33
34
35
36
37
38
39
40
41
42
43
44
45
46
47
48
49
50
51
52
53
54
55
56
57
58
59
60
61
62
63
64
65
66
67
68
69
70
71
72
73
74
75
76
77
78
79
80
81
82
83
84
85
86
87
88
89
90
91
92
93
94
95
96
97
98
99
100
101
102
103
104
105
106
107
108
109
110
111
112
113
114
115
116
117
118
119
120
121
122
123
124
125
126
# 腾讯云asr,输入base64编码的wav音频,输出text,此函数需异步调用,以节约请求事件
#from tencentcloud.common import credential
#from tencentcloud.common.profile.client_profile import ClientProfile
#from tencentcloud.common.profile.http_profile import HttpProfile
#from tencentcloud.asr.v20190614 import asr_client, models
from aip import AipSpeech
import struct
import pvporcupine
import pyaudio
#import asyncio
import json
import base64
import io
import wave
import pvcobra
import time
porcupine_key = "xxxx"

porcupine_model = '/file/model/hello-chat_en_raspberry-pi_v3_0_0.ppn'

# 读取文件
def get_file_content(filePath):  # filePath  待读取文件名
    with open(filePath, 'rb') as fp:
        return fp.read()

def sound_record():

    porcupine = pvporcupine.create(access_key=porcupine_key, keyword_paths=[porcupine_model])

    cobra = pvcobra.create(access_key=porcupine_key)

    # 开启录音流

    kws_audio = pyaudio.PyAudio()

    audio_stream = kws_audio.open(

        rate=porcupine.sample_rate,

        channels=1,

        format=pyaudio.paInt16,

        input=True,
        frames_per_buffer=porcupine.frame_length,
        input_device_index=None,
    )

    is_voiced = 1
    # 开始录音
    frames = []
    print("开始录音...")
    silence_count = 0
    recording = []
    time.sleep( 1 )
    while is_voiced:
        pcm = audio_stream.read(porcupine.frame_length)
        _pcm = struct.unpack_from("h" * porcupine.frame_length, pcm)
        is_voiced = cobra.process(_pcm)
        print(is_voiced,silence_count)
        silence_count = 0 if is_voiced > 0.5 else silence_count  + 1
        if silence_count <= 100:
            if silence_count < 70:
                recording.extend(_pcm)
        else:
            break
    filename = save_audio(recording)
    audio_stream.stop_stream()
    audio_stream.close()
    porcupine.delete()
    kws_audio.terminate()
    # 保存录音结果为WAV文件
    print(f"录音已保存:recorded_audio.wav")
    return filename


def save_audio(data, filename="/file/tmp/recorded_audio.wav"):
    wf = wave.open(filename, 'wb')
    wf.setnchannels(1)
    wf.setsampwidth(2)
    wf.setframerate(16000)  # Adjust the sample rate as needed
    wf.writeframes(b''.join(struct.pack('h', sample) for sample in data))
    wf.close()
    return filename

''' 你的APPID AK SK  参数在申请的百度云语音服务的控制台查看'''
APP_ID = 'xxxx'
API_KEY = 'xxxx'
SECRET_KEY = 'xxxxx'
textPath = '/file/tmp/text.txt'
# 新建一个AipSpeech
client = AipSpeech(APP_ID, API_KEY, SECRET_KEY)
def baidu_stt(filename):
    result = client.asr(get_file_content(filename), 'wav', 16000, {'dev_pid': 1536})
    if result['err_msg'] == 'success.':
        print("stt successful")
        word = result['result'][0].encode('utf-8')  # utf-8编码
        wordStr = word.decode('utf-8')  # Decode the bytes to a string
        if wordStr != '':
            if wordStr[-3:] == ',':
                print(wordStr[:-3])
                with open(textPath, 'w', encoding='utf-8') as f:
                    f.write(wordStr[:-3])
            else:
                print(wordStr)
                with open(textPath, 'w', encoding='utf-8') as f:
                    f.write(wordStr)
        else:
            print("音频文件不存在或格式错误")
    else:
        print("错误")
    return wordStr

def listen(model: str = "baidu"):
    filepath = sound_record()
    if model == "baidu":
        user_words = baidu_stt(filepath)
    else:
        user_words = "Unsupported speech recognition model"
    if user_words == "":
     print("你什么都没说")
    else:
        print("你说了: ", user_words)
    return user_words
listen()
原来是这里出现了问题
1
2
3
    if silence_count <= 100:

        if silence_count < 70:
我再电脑上用的时候,只需要80和10就可以了,但在树莓派上面就得改改,树莓派上面的那个silence加得特别的快,开始录音到你说话的那一点点时间,很快就调完了,而且麦克风质量不太好,所以静默检测时间改长一点(silence_count增大),录音的灵敏度调高(silence_count)。
1
2
    if silence_count <= 80:
        if silence_count < 10:
最终实现效果。 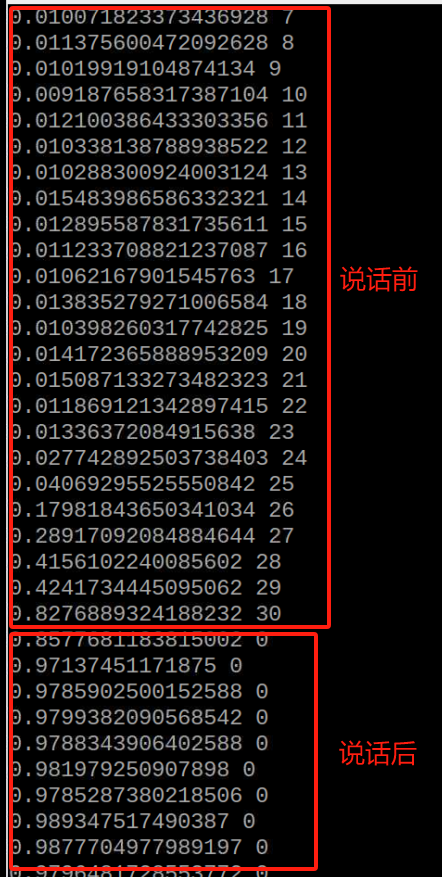
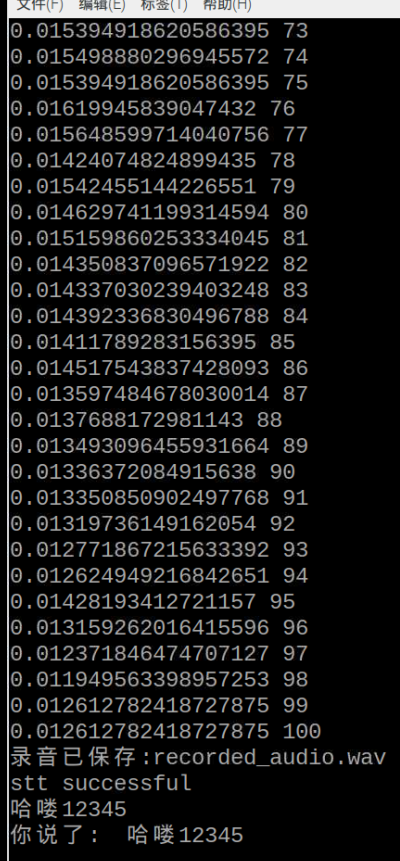
识别效果还可以,就只是不知道为什么标点符号不见,但先不管,即便没有标点,chat应该也能看得懂。
报错:
1
2
3
4
5
6
7
8
9
10
11
12
开始录音...
0.018264278769493103 0
Traceback (most recent call last):
File "wav_recognize.py", line 123, in <module>
    listen()
File "wav_recognize.py", line 108, in listen
    filepath = sound_record()
File "wav_recognize.py", line 46, in sound_record
    pcm = audio_stream.read(porcupine.frame_length)
File "/home/pi/Desktop/sleep/lib/python3.7/site-packages/pyaudio/__init__.py", line 571, in read
    exception_on_overflow)
OSError: [Errno -9981] Input overflowed
很眼熟的报错,但我之前没有记录这个错误,有点气。
解决(使用1和3就成功了):
1
2
3
4
5
6
7
8
9
10
11
12
13
14
15
16
17
18
19
20
21
22
23
24
25
26
27
28
29
30
31
1. Error: [Errno -9981] Input overflowed,表明输入音频流溢出,即尝试读取的音频数据量超过了当前可用的数据。这可能是因为你的代码以比音频捕获速率更快的速度读取音频数据。
调整每缓冲帧数:修改audio_stream.open调用中的frames_per_buffer参数。较小的值可能有助于防止溢出。尝试不同的值,找到响应性和避免溢出之间的平衡。
audio_stream = kws_audio.open(
rate=porcupine.sample_rate,
channels=1,
format=pyaudio.paInt16,
input=True,
frames_per_buffer=1024,  # 调整此值
input_device_index=None,
)

2.使用非阻塞模式:尝试在读取音频数据时使用非阻塞模式:
while True:
try:
    pcm = audio_stream.read(porcupine.frame_length, exception_on_overflow=False)
    if pcm:
        _pcm = struct.unpack_from("h" * porcupine.frame_length, pcm)
        is_voiced = cobra.process(_pcm)
        print(is_voiced, silence_count)
        silence_count = 0 if is_voiced > 0.5 else silence_count + 1
        if silence_count <= 100:
            if silence_count < 70:
                recording.extend(_pcm)
        else:
            break
except IOError as e:
    # 处理 IOError,例如打印异常
    print(f"Error reading audio: {e}")

3.调整休眠时长:检查你的循环中的休眠时长,确保它适当。太长的休眠可能会导致数据积压。
time.sleep(0.1)  # 调整休眠时长
似乎百度api的使用方法更新了,突然用不了了。
原来是额度用完了,换个资源。