
环境
代码:https://github.com/Eerrly/VITSAIChatVtube
pip3 install torch (失败)
到官网下载:https://download.pytorch.org/whl/torch_stable.html
我选择下载:cpu/torch-2.1.0-cp310-cp310-manylinux_2_17_aarch64.manylinux2014_aarch64.whl (失败:版本不合)
因为树莓派运行的是ARM架构的Linux系统,Python版本是3.10
1
2
3
4
5
6
7
8
9
10
11
12
13
14
15
16
17
18
19
20
21
22
23
24
25
26
27
28
29
例子:
cpu/torch-2.1.0%2Bcpu-cp310-cp310-win_amd64.whl 文件名中的信息如下:

cpu: 这表示PyTorch是用于CPU的版本,不包括GPU支持。

torch-2.1.0: 这是PyTorch的版本号,指示您安装的PyTorch版本。

%2Bcpu: 这表示这个PyTorch版本是CPU版本,没有GPU支持。

cp310-cp310: 这表示该安装包是为Python 3.10编译的,适用于Python 3.10。

win_amd64: 这表示该安装包适用于Windows 64位操作系统,通常是在64位的Windows系统上使用。

最后我安装的是Cython-3.0.5-py2.py3-none-any.whl,这意味着什么

ChatGPT回答
Cython-3.0.5-py2.py3-none-any.whl 是一个不特定于架构的Python wheel文件,适用于多个Python版本和平台。让我解释这个文件名的各部分:

Cython-3.0.5: 这是Cython的版本号,指示您安装的Cython版本。

py2.py3: 这表示该wheel文件适用于Python 2和Python 3,不依赖于特定的Python版本。

none: 这表示该wheel文件不包含任何特定的二进制代码,它是纯Python代码的wheel文件。

any: 这表示该wheel文件不依赖于特定的操作系统或平台,因此可以在各种操作系统和架构上使用。

这种类型的wheel文件通常是纯Python库的wheel文件,它们不包含与特定操作系统或硬件架构相关的二进制代码,因此可以在多个平台和Python版本上使用。

因此,您选择安装的Cython-3.0.5-py2.py3-none-any.whl适用于不同的Python版本和不同的操作系统/平台,这使它成为一个通用的Cython安装包。这个通用性使得它可以在各种环境中使用,而不需要考虑特定的架构或Python版本。
- 添加环境变量
nano ~/.bashrc
1
2
3
4
export NO_CUDA=1
export NO_DISTRIBUTED=1
export NO_MKLDNN=1
export MAX_JOBS=1    #如果是树莓派4B,这里修改为4
source ~/.bashrc
- 添加软件源
sudo nano /etc/apt/sources.list
添加这两行源,不要注释原来的,原来的保持即可
deb http://ftp.de.debian.org/debian stretch main deb http://ftp.cn.debian.org/debian stretch main
sudo apt-get -y update
3.安装torch依赖
sudo apt install libopenblas-dev libblas-dev m4 cmake cython
pip3 install numpy pyyaml cython
安装 numpy 依赖 不安装或者安装失败也是不会报错的,但是使用的时候不会出结果,如果你的项目没用到 numpy 可以跳过这一步,我没安装
pip3 install cpu/torch-2.1.0-cp310-cp310-manylinux_2_17_aarch64.manylinux2014_aarch64.whl(失败)
换个方法: https://handbook.pytorch.wiki/pi/readme.html
继续
编译pytorch 1.4(失败)
1
2
3
4
5
6
git clone --recursive https://github.com/pytorch/pytorch
cd pytorch
git checkout v1.4 #这里选择最新的1.4版
git submodule sync
git submodule update --init --recursive
git submodule update --remote third_party/protobuf #这句必须要有,否则在编译时会报一个找不到protobuf.h的错误
原因如这里面说的:https://blog.nowcoder.net/n/7f716bb57594459cac983ee8df7d3c63 还有https://cloud.tencent.com/developer/article/1908168
对torch源码进行编译(编译时间过长,长达4个小时,与github连接不稳定,容易导致编译数据下载不完善)
我不应该用python3.10,源不稳定,下载慢。
看来得重新装过系统了
python 3.7环境
2023年11月17日01:49:25
重装没有想象中的复杂和麻烦,只是拖延罢了,大概用了一个下午的时间就复现了之前做过的,然后又到了这里。
https://blog.csdn.net/ZhaoDongyu_AK47/article/details/105055856
安装库torch
首先想到的方法当然是pip直接安装,通过pip搜索torch
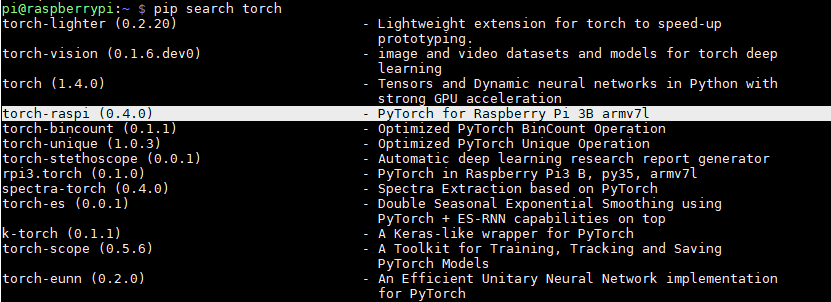
下载编译好的文件
torch-1.3.0a0+de394b6-cp37-cp37m-linux_armv7l.whl 提取码:ioat torchvision-0.4.1a0+a263704-cp37-cp37m-linux_armv7l.whl 提取码:g0sz
安装Pytorch 安装必要的依赖包sudo apt-get install libopenblas-dev
安装numpy pip3 install numpy pyyaml(没有numpy的话也能成功编译,但是编译出来的PyTorch不支持numpy)
安装torch pip3 install torch-1.3.0a0+de394b6-cp37-cp37m-linux_armv7l.whl
安装torchvision pip3 install torchvision-0.4.1a0+a263704-cp37-cp37m-linux_armv7l.whl
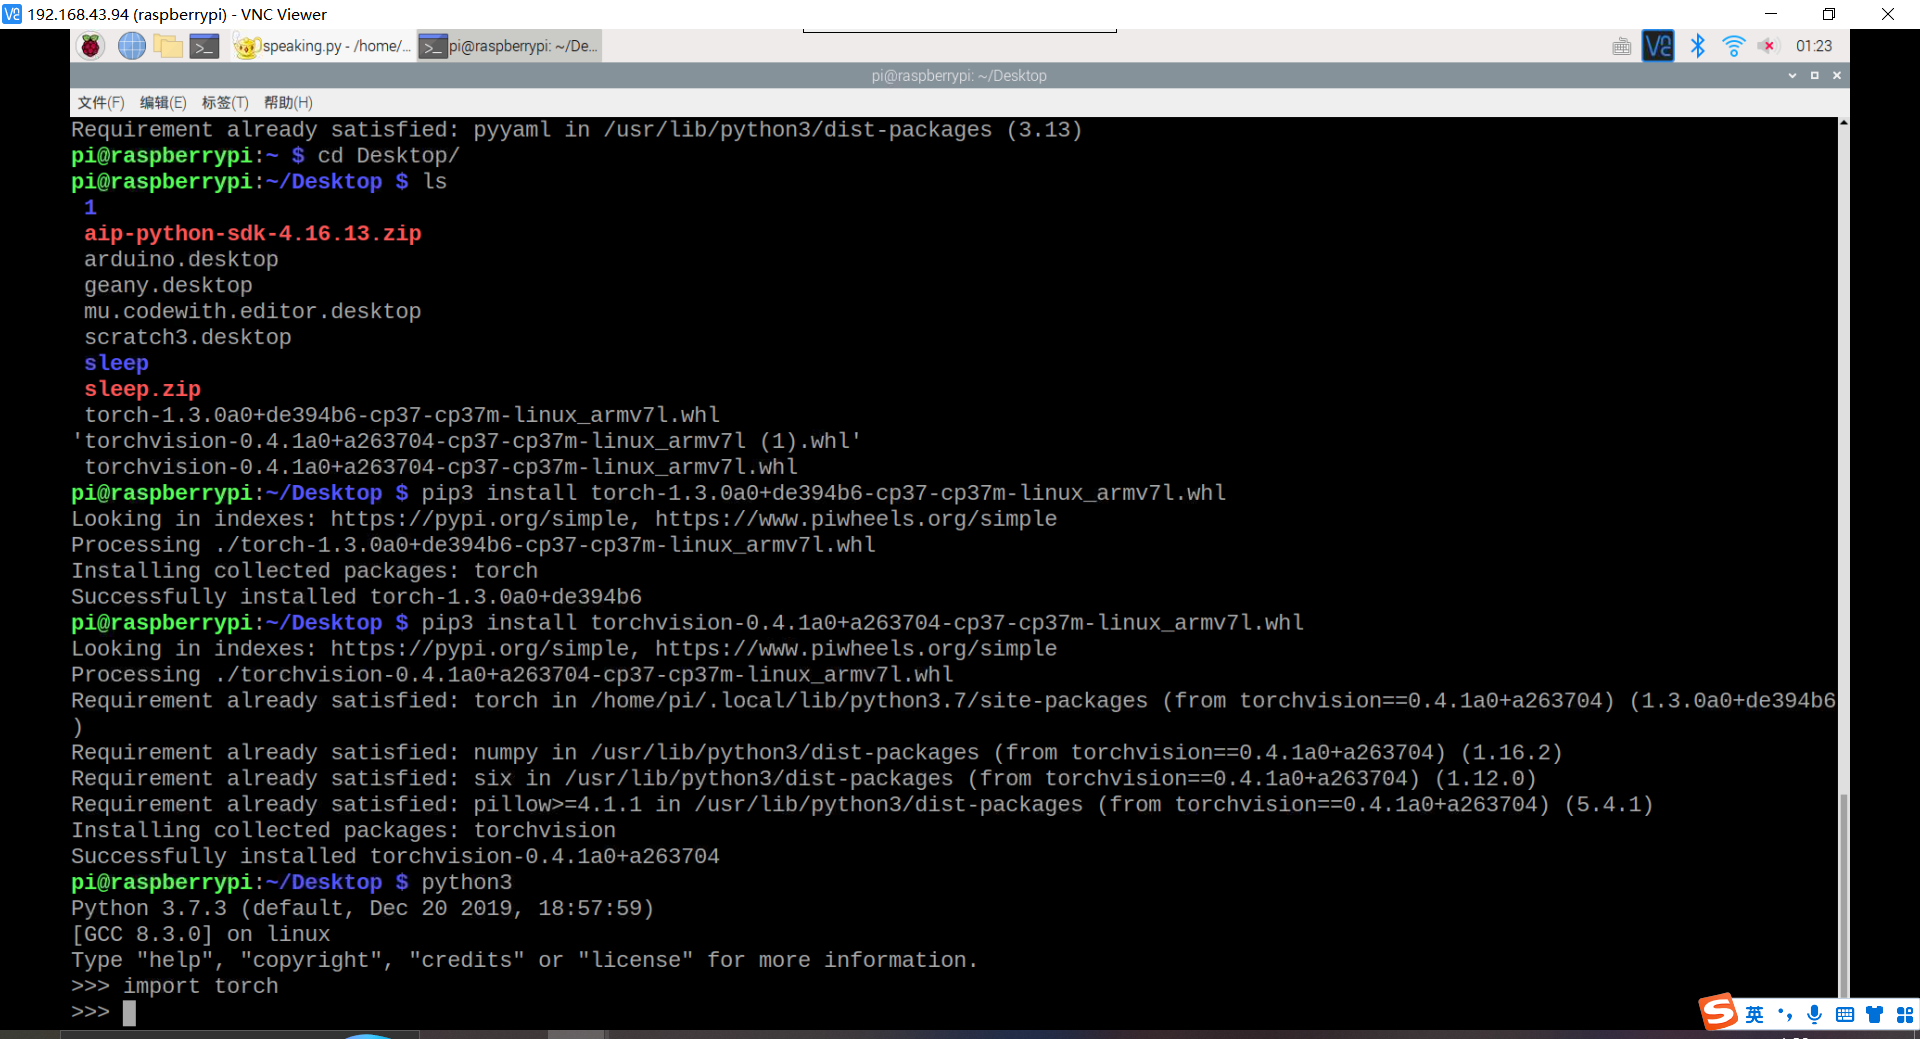
成功,舒服
安装scipy和librosa库,(numpy已安装)
参考:https://blog.csdn.net/weixin_43414694/article/details/111875711
进入root环境:su root
安装scipy
1
2
3
4
5
sudo apt-get install libblas-dev
sudo apt-get install liblapack-dev
sudo apt-get install gfortran
sudo apt-get install python-scipy
pip3 install scipy==1.6.3
安装librosa
pip3 install librosa==0.8.0
或许安装环境这东西在深夜安装才是最好的,等待1个多小时的时间间隙可以睡一觉,调个闹钟,过会在看。不怕时间长,就怕失败。
安装过程中报了几个错,将相应的包安装, 安装了scipy的,也安装了numpy的,但直至卡在了LLVM7那里,说是找不到。
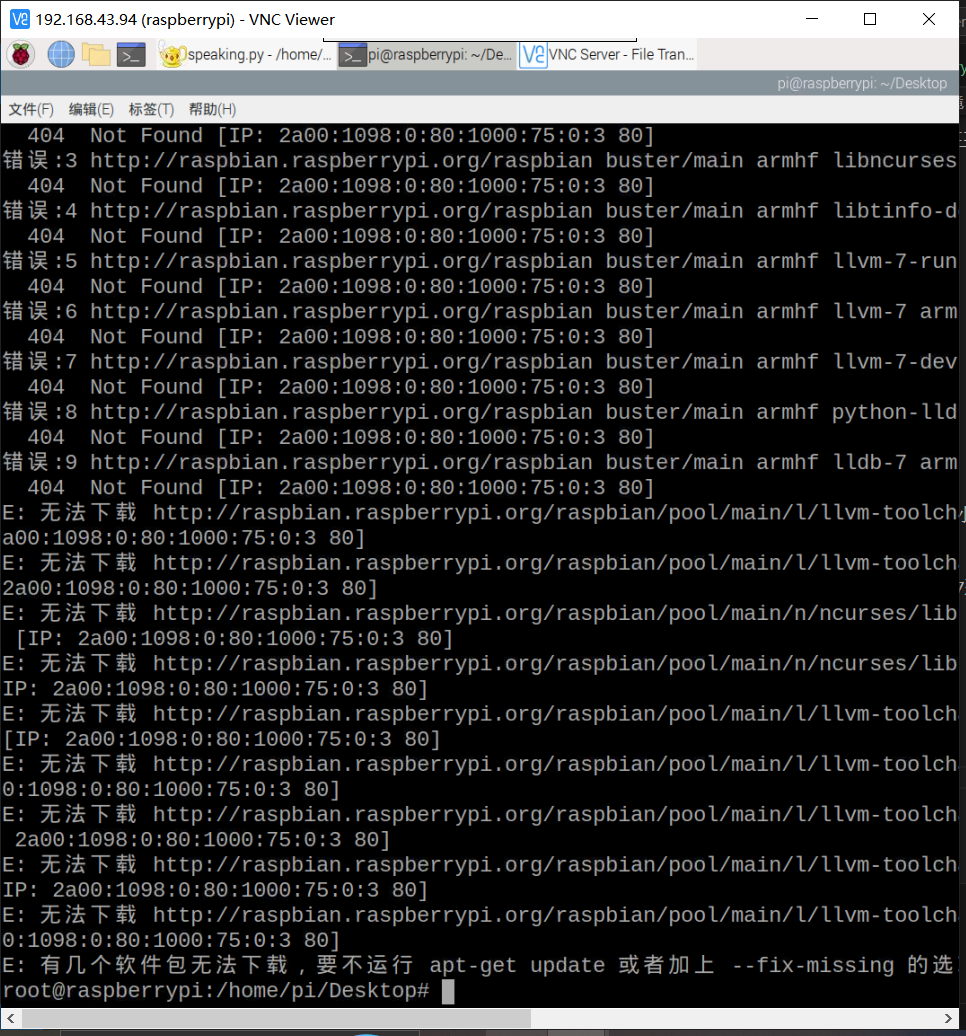
解决方法:
1
2
3
1.在LLVM官网下载包安装
2.更新源
3.在google上寻找答案
学习正确地如何更新源是最稳扎稳打的方法,其次是去官网下载,后续或许还会遇到各种各样的找不到包的问题,问题源头大多都是指向源。上一次根据网上攻略做变成了这般模样,
然后决定重装系统,还有必要深度学习一下配置源
源
一、什么是源?
软件源就是一个应用程序安装库,很多很多的应用软件都在这个库里面。他可以是网络服务器,是光盘,甚至是硬盘上的一个目录。
常见软件源类型GEM源、APT源、YAST源、ISO源、YUM源、UAP源
二、为什么换源?
树莓派系统默认下载软件的服务器在国外,经常出现下载慢、无法更新的情况。这就需要更换为国内的镜像站来加快速度了。
首先我们的树莓派系统是是基于debian改造出来的。在2016年2月发布了树莓派3B,采用64位处理器的树莓派3B,虽然具有64位硬件,但是系统依旧使用的是基于debian 8 的 32位的Jessie,所以不能完全的释放出树莓派3B的性能,随着debian升级到了最新的debian 9 stretch,到了2017-08-16树莓派对官方系统的版本号进行了更新,由之前的jessie升级到了基于最新64位的debian 9 stretch
那么我们怎么知道自己的系统版本呢?
可以根据自己的系统版本时间来确定,2017年8月16日以前的都为jessie而之后的都为stretch.
可以在终端输入下面的命令,就可以看到自己的系统是哪一个了。
1
2
3
4
5
6
7
8
9
10
11
12
13
14
15
#查看系统版本
root@raspberrypi:/home/pi/Desktop# lsb_release -a
No LSB modules are available.
Distributor ID:	Raspbian
Description:	Raspbian GNU/Linux 10 (buster)
Release:	10
Codename:	buster
#查看系统架构
root@raspberrypi:/home/pi/Desktop# uname -m
armv7l
#查看系统位数
root@raspberrypi:/home/pi/Desktop# getconf LONG_BIT
32
#检查 C++ 编译器版本
gcc -v
配置软件源
1
2
3
4
5
6
7
8
9
10
11
12
sudo nano /etc/apt/sources.list
deb https://mirrors.tuna.tsinghua.edu.cn/raspbian/raspbian/ buster main non-free contrib rpi
deb-src https://mirrors.tuna.tsinghua.edu.cn/raspbian/raspbian/ buster main non-free contrib rpi
sudo nano /etc/apt/sources.list.d/raspi.list
同样的方法,把 /etc/apt/sources.list.d/raspi.list 文件也替换成下面的内容:
deb http://mirrors.tuna.tsinghua.edu.cn/raspberrypi/ buster main ui
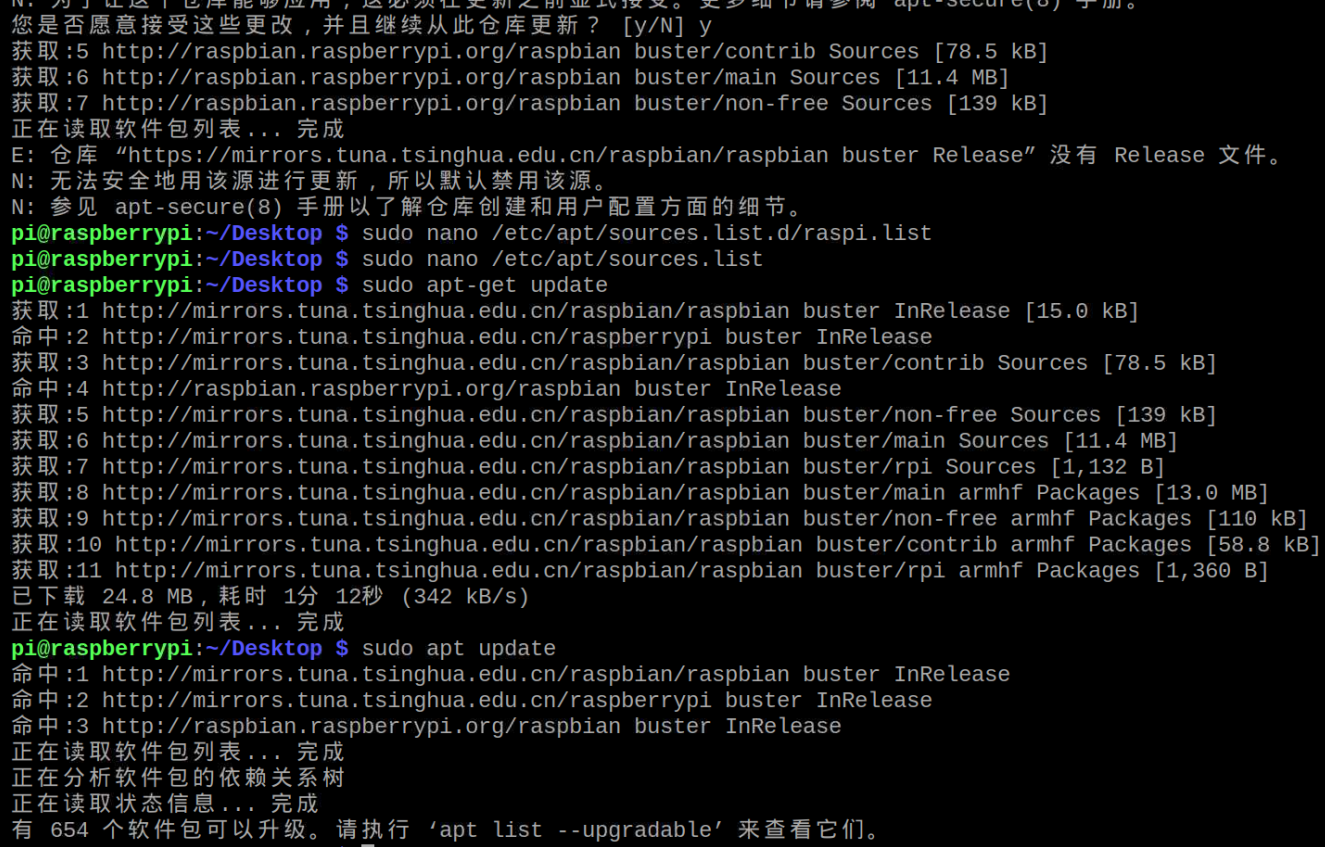
sudo apt-get update
报错:
1
2
3
4
5
6
7
8
Certificate verification failed: The certificate is NOT trusted. The certificate chain uses expired certificate.  Could not handshake: Error in the certificate verification. [IP: 2402:f000:1:400::2 443]
获取:4 http://raspbian.raspberrypi.org/raspbian buster InRelease [15.0 kB]
正在读取软件包列表... 完成
E: 仓库 “https://mirrors.tuna.tsinghua.edu.cn/raspbian/raspbian buster Release” 没有 Release 文件。
N: 无法安全地用该源进行更新,所以默认禁用该源。
N: 参见 apt-secure(8) 手册以了解仓库创建和用户配置方面的细节。
E: 仓库'http://raspbian.raspberrypi.org/raspbian buster InRelease'将其'Suite'值从'stable'修改到了'oldoldstable'
N: 为了让这个仓库能够应用,这必须在更新之前显式接受。更多细节请参阅 apt-secure(8) 手册。

1.为了让这个仓库能够应用,这必须在更新之前显式接受。更多细节请参阅 apt-secure(8) 手册。
解决方案:sudo apt update,然后按Y
2.证书不被信任,树莓派清华源 Certificate verification failed: The certificate is NOT trusted
解决方案:使用http协议,sudo nano /etc/apt/sources.list,将里面的https换成http(成功)
pip换源后,更新pip,然后发现pip3安装东西都会报错了
root@raspberrypi:/home/pi/Desktop# pip3 install librosa==0.8.0 Traceback (most recent call last): File “/home/pi/.local/bin/pip3”, line 5, in
折腾一番后,最终解决方案为python3 -m pip install package-name这个替代pip3 install package-name
安装python3 -m pip install librosa==0.8.0
这个执行到Installing build dependencies … 这里的时候,就似乎是卡主了,运行极慢。等了大概超过半小时,终于行了,但报了深不见底的错。
卡主的原因可能是因为swap空间不住
free -m 查看swap空间大小(96左右)
sudo apt-get install dphys-swapfile
sudo nano /etc/dphys-swapfile
CONF_SWAPSIZE=4096
sudo /etc/init.d/dphys-swapfile restart
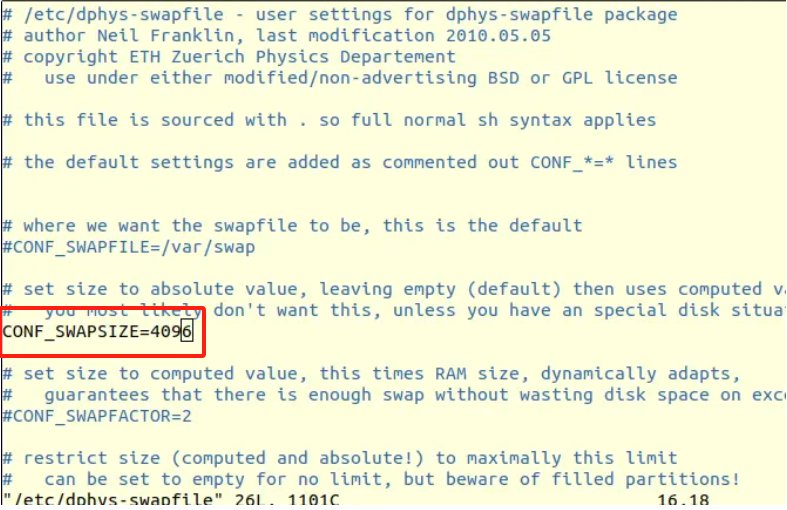
重启
free -m 查看,变为了4095,再次python3 -m pip install librosa==0.8.0
结果似乎快上了一点。但结果还是一样,似乎问题出现在scikit-learn
安装scikit-learn
1
2
3
4
5
6
pip3 install -U numpy                                      #升级numpy

sudo apt-get install python3-numpy python3-scipy python3-matplotlib

sudo apt-get install python3-skimage
sudo apt-get install python3-sklearn                      #安装sklearn模块
再次执行python3 -m pip install librosa==0.8.0
1
2
3
4
5
6
7
8
9
10
11
12
13
14
15
16
结果为:
....
....
Building wheels for collected packages: librosa, cffi
Running setup.py bdist_wheel for librosa ... done
Stored in directory: /root/.cache/pip/wheels/c3/e9/9c/5181c1898db99d0cb3287b63d94ba979fe770e3ebfb0d9ede8
Running setup.py bdist_wheel for cffi ... done
Stored in directory: /root/.cache/pip/wheels/e7/8b/98/0b9ebf9b0437ab0cc59a2c6e922d4ebdeb17c089339583c845
Successfully built librosa cffi
resampy 0.4.2 has requirement numba>=0.53, but you'll have numba 0.48.0 which is incompatible.
resampy 0.4.2 has requirement numpy>=1.17, but you'll have numpy 1.16.2 which is incompatible.
Installing collected packages: audioread, joblib, packaging, typing-extensions, platformdirs, pooch, resampy, pycparser, cffi, soundfile, librosa
Found existing installation: joblib 0.13.0
    Not uninstalling joblib at /usr/lib/python3/dist-packages, outside environment /usr
    Can't uninstall 'joblib'. No files were found to uninstall.
Successfully installed audioread-3.0.1 cffi-1.15.1 joblib-1.3.2 librosa-0.8.0 packaging-23.2 platformdirs-4.0.0 pooch-1.8.0 pycparser-2.21 resampy-0.4.2 soundfile-0.12.1 typing-extensions-4.7.1
需要更新numba和numpy
更新了numpy但numba不行,
心累。似乎换了pip源之后就一堆堆的错误了。还是先搞定pip先。
解决ModuleNotFoundError: No module named ‘pip._internal.cli.main’
这很难评
当时搞半天都无法解决的大问题,当下没半个钟就解决了。
这就是效率问题。半个小时没效果,或是厌烦困倦,就有必要去休息一下,或是换个口味。
出现”ModuleNotFoundError: No module named ‘pip._internal’”错误通常是由于Python环境中pip模块未正确安装或损坏引起的。
我是root下pip不行的,就应该在root下重装pip
python -m pip install –upgrade pip python3 -m pip install –upgrade pip
安装librosa==0.8.0
前言
先前操作了乱七八糟的,也不知道搞了什么,对着一个博主的方法死磕,实属不智,还应该多个博主的方法相互比对,然后再进行选择。
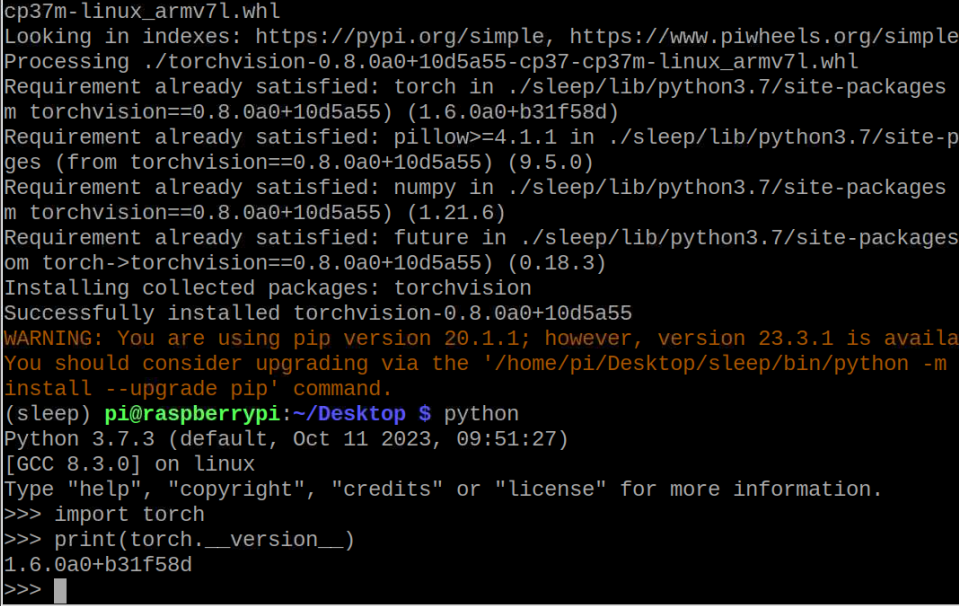
pi@raspberrypi:~ $ pip list Package Version —————— ————— Adafruit-BMP 1.5.4 Adafruit-DHT 1.4.0 Adafruit-GPIO 1.0.4 Adafruit-PureIO 1.1.5 appdirs 1.4.3 asn1crypto 0.24.0 astroid 2.1.0 asttokens 1.1.13 atomicwrites 1.1.5 attrs 18.2.0 audioread 3.0.1 automationhat 0.2.0 baidu-aip 4.16.13 beautifulsoup4 4.7.1 blinker 1.4 blinkt 0.1.2 blosc 1.7.0 buttonshim 0.0.2 cachetools 5.3.2 Cap1xxx 0.1.3 certifi 2018.8.24 cffi 1.15.1 chardet 3.0.4 Click 7.0 cloudpickle 0.8.0 colorama 0.3.7 colorzero 1.1 cookies 2.2.1 cryptography 2.6.1 cycler 0.10.0 dask 1.0.0+dfsg dataclasses 0.6 decorator 4.3.0 devscripts 2.19.5+deb10u1 distlib 0.3.0 docutils 0.14 drumhat 0.1.0 entrypoints 0.3 envirophat 1.0.0 ExplorerHAT 0.4.2 filelock 3.0.12 Flask 1.0.2 fourletterphat 0.1.0 GDAL 2.4.0 gpg 1.12.0 gpiozero 1.5.1 guizero 0.6.0 html5lib 1.0.1 idna 2.6 importlib-metadata 1.6.0 ipykernel 4.9.0 ipython 5.8.0 ipython_genutils 0.2.0 isort 4.3.4 itsdangerous 0.24 jedi 0.13.2 Jinja2 2.10 joblib 1.3.2 jupyter-client 5.2.3 jupyter-core 4.4.0 keyring 17.1.1 keyrings.alt 3.1.1 kiwisolver 1.0.1 lazy-object-proxy 1.3.1 librosa 0.8.0 llvmlite 0.31.0 locket 0.2.0 logilab-common 1.4.2 lxml 4.3.2 MarkupSafe 1.1.0 matplotlib 3.0.2 mccabe 0.6.1 microdotphat 0.2.1 more-itertools 4.2.0 mote 0.0.4 motephat 0.0.2 mypy 0.670 mypy-extensions 0.4.1 networkx 2.2 nose 1.3.7 nudatus 0.0.4 numba 0.48.0 numexpr 2.6.9 numpy 1.21.6 oauthlib 2.1.0 olefile 0.46 packaging 23.2 pandas 0.23.3+dfsg pantilthat 0.0.7 parso 0.3.1 partd 0.3.9 pexpect 4.6.0 pgzero 1.2 phatbeat 0.1.1 pianohat 0.1.0 picamera 1.13 pickleshare 0.7.5 picraft 1.0 piglow 1.2.5 pigpio 1.44 Pillow 5.4.1 pip 23.3.1 platformdirs 4.0.0 pluggy 0.8.0 pooch 1.8.0 prompt-toolkit 1.0.15 psutil 5.5.1 pvcobra 2.0.0 pvporcupine 3.0.0 py 1.7.0 PyAudio 0.2.11 pycairo 1.16.2 pycodestyle 2.4.0 pycparser 2.21 pycrypto 2.6.1 pyflakes 2.0.0 pygame 1.9.4.post1 Pygments 2.3.1 PyGObject 3.30.4 pyinotify 0.9.6 PyJWT 1.7.0 pylint 2.2.2 pylirc2 0.1 pyOpenSSL 19.0.0 pyparsing 2.2.0 pyserial 3.4 pytest 3.10.1 python-apt 1.8.4.1 python-dateutil 2.7.3 python-debian 0.1.35 python-magic 0.4.16 pytz 2019.1 PyWavelets 0.5.1 pyxdg 0.25 PyYAML 3.13 pyzmq 17.1.2 qtconsole 4.3.1 rainbowhat 0.1.0 requests 2.21.0 requests-oauthlib 1.0.0 resampy 0.4.2 responses 0.9.0 roman 2.0.0 RPi.GPIO 0.7.0 RTIMULib 7.2.1 scikit-image 0.14.2 scikit-learn 1.0.2 scipy 1.7.3 scrollphat 0.0.7 scrollphathd 1.2.1 SecretStorage 2.3.1 semver 2.0.1 Send2Trash 1.5.0 sense-emu 1.1 sense-hat 2.2.0 setuptools 40.8.0 simplegeneric 0.8.1 simplejson 3.16.0 six 1.12.0 skywriter 0.0.7 sn3218 1.2.7 soundfile 0.12.1 soupsieve 1.8 spidev 3.4 ssh-import-id 5.7 tables 3.4.4 thonny 3.2.6 threadpoolctl 3.1.0 toolz 0.9.0 torch 1.3.0a0+de394b6 torchvision 0.4.1a0+a263704 tornado 5.1.1 touchphat 0.0.1 traitlets 4.3.2 twython 3.7.0 typed-ast 1.3.1 typing_extensions 4.7.1 uflash 1.2.4 unicornhathd 0.0.4 unidiff 0.5.4 urllib3 1.24.1 virtualenv 20.0.21 wcwidth 0.1.7 webencodings 0.5.1 Werkzeug 0.14.1 wheel 0.32.3 wrapt 1.10.11 zhipuai 1.0.7 zipp 3.1.0
pi@raspberrypi:~ $ su root 密码: root@raspberrypi:/home/pi# pip list Package Version —————— ————– Adafruit-BMP 1.5.4 Adafruit-DHT 1.4.0 Adafruit-GPIO 1.0.4 Adafruit-PureIO 1.1.5 appdirs 1.4.3 asn1crypto 0.24.0 astroid 2.1.0 asttokens 1.1.13 atomicwrites 1.1.5 attrs 18.2.0 audioread 3.0.1 automationhat 0.2.0 baidu-aip 4.16.13 beautifulsoup4 4.7.1 blinker 1.4 blinkt 0.1.2 blosc 1.7.0 buttonshim 0.0.2 Cap1xxx 0.1.3 certifi 2018.8.24 cffi 1.15.1 chardet 3.0.4 Click 7.0 cloudpickle 0.8.0 colorama 0.3.7 colorzero 1.1 cookies 2.2.1 cryptography 2.6.1 cycler 0.10.0 dask 1.0.0+dfsg decorator 4.3.0 devscripts 2.19.5+deb10u1 distlib 0.3.0 docutils 0.14 drumhat 0.1.0 entrypoints 0.3 envirophat 1.0.0 ExplorerHAT 0.4.2 filelock 3.0.12 Flask 1.0.2 fourletterphat 0.1.0 GDAL 2.4.0 gpg 1.12.0 gpiozero 1.5.1 guizero 0.6.0 html5lib 1.0.1 idna 2.6 importlib-metadata 1.6.0 ipykernel 4.9.0 ipython 5.8.0 ipython_genutils 0.2.0 isort 4.3.4 itsdangerous 0.24 jedi 0.13.2 Jinja2 2.10 joblib 1.3.2 jupyter-client 5.2.3 jupyter-core 4.4.0 keyring 17.1.1 keyrings.alt 3.1.1 kiwisolver 1.0.1 lazy-object-proxy 1.3.1 librosa 0.8.0 llvmlite 0.31.0 locket 0.2.0 logilab-common 1.4.2 lxml 4.3.2 MarkupSafe 1.1.0 matplotlib 3.0.2 mccabe 0.6.1 microdotphat 0.2.1 more-itertools 4.2.0 mote 0.0.4 motephat 0.0.2 mypy 0.670 mypy-extensions 0.4.1 networkx 2.2 nose 1.3.7 nudatus 0.0.4 numba 0.48.0 numexpr 2.6.9 numpy 1.17.0 oauthlib 2.1.0 olefile 0.46 packaging 23.2 pandas 0.23.3+dfsg pantilthat 0.0.7 parso 0.3.1 partd 0.3.9 pexpect 4.6.0 pgzero 1.2 phatbeat 0.1.1 pianohat 0.1.0 picamera 1.13 pickleshare 0.7.5 picraft 1.0 piglow 1.2.5 pigpio 1.44 Pillow 5.4.1 pip 23.3.1 platformdirs 4.0.0 pluggy 0.8.0 pooch 1.8.0 prompt-toolkit 1.0.15 psutil 5.5.1 pvporcupine 3.0.0 py 1.7.0 PyAudio 0.2.11 pycairo 1.16.2 pycodestyle 2.4.0 pycparser 2.21 pycrypto 2.6.1 pyflakes 2.0.0 pygame 1.9.4.post1 Pygments 2.3.1 PyGObject 3.30.4 pyinotify 0.9.6 PyJWT 1.7.0 pylint 2.2.2 pylirc2 0.1 pyOpenSSL 19.0.0 pyparsing 2.2.0 pyserial 3.4 pytest 3.10.1 python-apt 1.8.4.1 python-dateutil 2.7.3 python-debian 0.1.35 python-magic 0.4.16 pytz 2019.1 PyWavelets 0.5.1 pyxdg 0.25 PyYAML 3.13 pyzmq 17.1.2 qtconsole 4.3.1 rainbowhat 0.1.0 requests 2.21.0 requests-oauthlib 1.0.0 resampy 0.4.2 responses 0.9.0 roman 2.0.0 RPi.GPIO 0.7.0 RTIMULib 7.2.1 scikit-image 0.14.2 scikit-learn 0.20.2 scipy 1.1.0 scrollphat 0.0.7 scrollphathd 1.2.1 SecretStorage 2.3.1 semver 2.0.1 Send2Trash 1.5.0 sense-emu 1.1 sense-hat 2.2.0 setuptools 40.8.0 simplegeneric 0.8.1 simplejson 3.16.0 six 1.12.0 skywriter 0.0.7 sn3218 1.2.7 soundfile 0.12.1 soupsieve 1.8 spidev 3.4 ssh-import-id 5.7 tables 3.4.4 thonny 3.2.6 toolz 0.9.0 tornado 5.1.1 touchphat 0.0.1 traitlets 4.3.2 twython 3.7.0 typed-ast 1.3.1 typing_extensions 4.7.1 uflash 1.2.4 unicornhathd 0.0.4 unidiff 0.5.4 urllib3 1.24.1 virtualenv 20.0.21 wcwidth 0.1.7 webencodings 0.5.1 Werkzeug 0.14.1 wheel 0.32.3 wrapt 1.10.11 zipp 3.1.0
numpy 版本不同:
在普通用户 pi 的环境中,numpy 的版本是 1.21.6。 在 root 用户的环境中,numpy 的版本是 1.17.0。
scikit-learn 版本不同:
在普通用户 pi 的环境中,scikit-learn 的版本是 1.0.2。 在 root 用户的环境中,scikit-learn 的版本是 0.20.2。
scipy 版本不同:
在普通用户 pi 的环境中,scipy 的版本是 1.7.3。 在 root 用户的环境中,scipy 的版本是 1.1.0。
删除在root下的这三个 pip uninstall numpy scikit-learn scipy
………..
sudo apt-get update(成功) sudo apt-get upgrade(成功) sudo apt-get dist-upgrade(成功) sudo rpi-update(失败)
su root
sudo apt-get install libblas-dev sudo apt-get install liblapack-dev sudo apt-get install gfortran sudo apt-get install python-scipy pip3 install scipy==1.6.3
再重装,关键在于安装librosa,关键在于speaking这个功能
源:
1
2
3
4
5
6
7
8
9
10
11
12
13
#查看系统版本
root@raspberrypi:/home/pi/Desktop# lsb_release -a
No LSB modules are available.
Distributor ID:	Raspbian
Description:	Raspbian GNU/Linux 10 (buster)
Release:	10
Codename:	buster
#查看系统架构
root@raspberrypi:/home/pi/Desktop# uname -m
armv7l
#查看系统位数
root@raspberrypi:/home/pi/Desktop# getconf LONG_BIT
32
配置软件源
1
2
3
4
5
6
7
8
9
10
11
12
sudo nano /etc/apt/sources.list

deb https://mirrors.tuna.tsinghua.edu.cn/raspbian/raspbian/ buster main non-free contrib rpi

deb-src https://mirrors.tuna.tsinghua.edu.cn/raspbian/raspbian/ buster main non-free contrib rpi

sudo nano /etc/apt/sources.list.d/raspi.list
同样的方法,把 /etc/apt/sources.list.d/raspi.list 文件也替换成下面的内容:

deb http://mirrors.tuna.tsinghua.edu.cn/raspberrypi/ buster main ui

sudo apt-get update
报错:
1
2
3
4
5
6
7
8
Certificate verification failed: The certificate is NOT trusted. The certificate chain uses expired certificate.  Could not handshake: Error in the certificate verification. [IP: 2402:f000:1:400::2 443]
获取:4 http://raspbian.raspberrypi.org/raspbian buster InRelease [15.0 kB]
正在读取软件包列表... 完成
E: 仓库 “https://mirrors.tuna.tsinghua.edu.cn/raspbian/raspbian buster Release” 没有 Release 文件。
N: 无法安全地用该源进行更新,所以默认禁用该源。
N: 参见 apt-secure(8) 手册以了解仓库创建和用户配置方面的细节。
E: 仓库'http://raspbian.raspberrypi.org/raspbian buster InRelease'将其'Suite'值从'stable'修改到了'oldoldstable'
N: 为了让这个仓库能够应用,这必须在更新之前显式接受。更多细节请参阅 apt-secure(8) 手册。
1.为了让这个仓库能够应用,这必须在更新之前显式接受。更多细节请参阅 apt-secure(8) 手册。
解决方案:sudo apt update,然后按Y(成功)
2.证书不被信任,树莓派清华源 Certificate verification failed: The certificate is NOT trusted
解决方案:使用http协议,sudo nano /etc/apt/sources.list,将里面的https换成http(成功)
配置pip源
1
2
3
4
5
6
7
8
9
10
sudo nano /etc/pip.conf

[global]
timeout=100
index-url=https://pypi.tuna.tsinghua.edu.cn/simple/
extra-index-url= http://mirrors.aliyun.com/pypi/simple/
[install]
trusted-host=
        pypi.tuna.tsinghua.edu.cn
        mirrors.aliyun.com
python -m pip install –upgrade pip python3 -m pip install –upgrade pip
我发现了一个管理虚拟环境的工具,之前我也接触过,virtualenv,应该很有用
在树莓派中配置虚拟环境virtualenv
1.树莓派安装python虚拟环境virtualenvwrapper
1
2
3
4
5
6
7
8
9
10
11
12
13
安装virtualenv和virtualenvwrapper
sudo apt-get install virtualenv
sudo apt-get install virtualenvwrapper

配置virtualenvwrapper
sudo nano ~/.bashrc
将以下命令行加入到加入到~/.bashrc的最后
#export VIRTUALENVWRAPPER_PYTHON=/usr/bin/python3
export WORKON_HOME=$HOME/.virtualenvs
source /usr/share/virtualenvwrapper/virtualenvwrapper.sh

输入命令运行
source ~/.bashrc
2.搭建虚拟目录
1
2
3
4
5
6
7
8
9
10
11
12
13
14
15
16
17
18
19
20
21
22
23
24
25
26
27
28
29
30
1.查看树莓派中python安装路径
python3
import sys
print(sys.path)

2.切换到想要存放虚拟环境的目录
例如:我存放的路径为:/home/pi/virtualenv_python
cd 你想要存放目录的路径下

3.新建虚拟环境
virtualenv -p /usr/bin/python3 test_vir_env
说明:
-p /usr/bin/python3 : 代表使用/usr/bin/ 目录下的python3创建一个虚拟环境;
test_vir_env :本次创建的虚拟环境的位置;

4.开启虚拟环境
例如我的路径下:source /home/pi/Desktop/sleep/bin/activate
source /你的路径/venv/bin/activate

5.查看安装的包
pip list

6.安装什么的
pip3 install 包名

7.退出虚拟环境
deactivate

补充:删除环境:
rm virtualenv 环境名
3.使用创建的虚拟环境
使用ThonnyIDE编辑python脚本文件
import numpy
a = numpy.ones((3, 5))
print (a)
2.配置树莓派ThonnyIDE的python解释器为创建的虚拟环境 i. 如图所示,单击Run,在弹出的菜单栏选择第一个,Select interpreter。
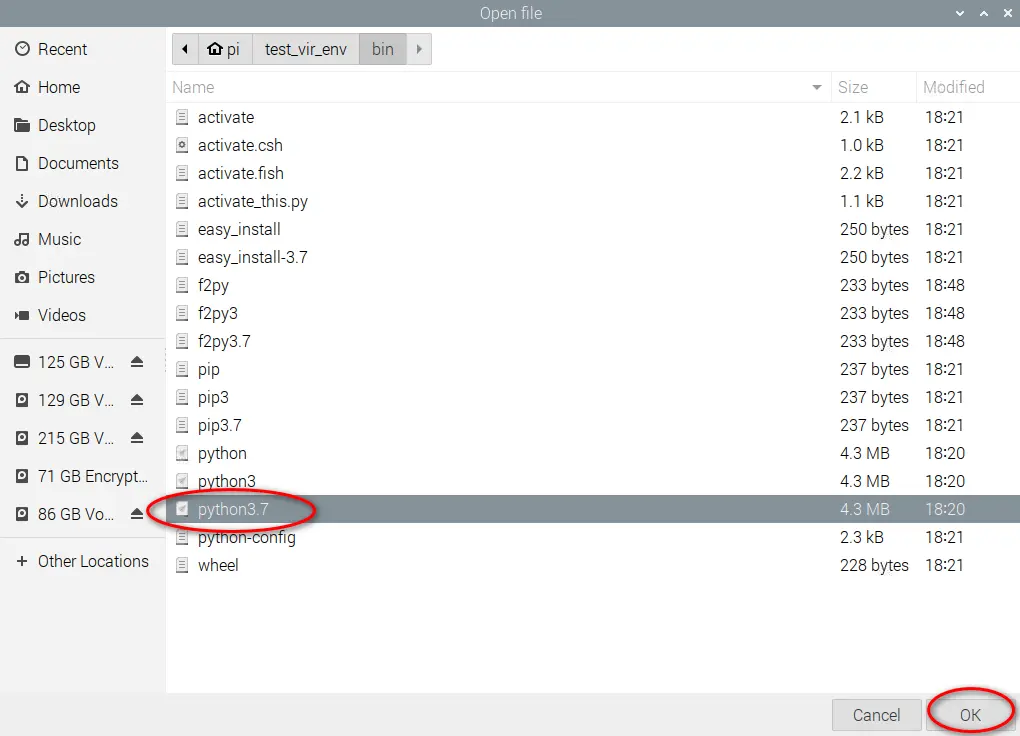
ii. 在弹出的配置窗口,根据下图选择。选择python解释器的位置
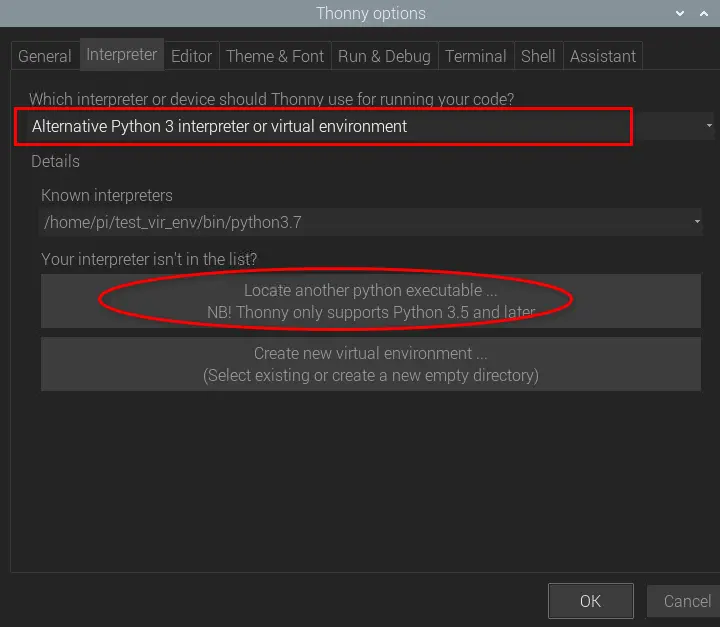
iii. 选择前面创建的虚拟环境的位置,并定位python执行文件的位置,一般为/bin/python。选择python3.7解释器
iv. 配置成功之后ThonnyIED会输入如下所示的提示信息。

v. 使用ThonnyIDE查看已经安装的包,如图所示,单击Tools,选择Manage packages。
源已经换好了,虚拟环境也搭好了,安装。
sudo apt-get install libblas-dev sudo apt-get install liblapack-dev sudo apt-get install gfortran sudo apt-get install python-scipy pip3 install scipy==1.6.3
(使用sudo意味着安装在系统目录,但虚拟环境是在普通用户,不过应该也能用把)
apt-get install lldb export PATH=”/usr/lib/llvm-7/bin:$PATH” pip3 install llvmlite==0.31.0 pip3 install numba==0.48.0 pip3 install resampy==0.2.2(这一句是原博客没有的) pip3 install librosa==0.8.0
然后就成功了
解决思路: 先将那一大坨的错误问题丢给gpt3.5分析一下,发现原来安装librosa的过程中需要安装resampy,而resampy自动安装版本0.4.2(好像是安装最新版本的),而这个又依赖与numba(版本要大于0.53)
原本我打算是升级一下numba的,但numba又依赖于LLVM,树莓派最高支持LLVM7,也就是说llvmlite最高为0.32.0,然后numba的版本又被限制了,总之resampy无法安装最新版本的,只能安装旧版。
然后我就问新必应,树莓派 LLVM7.0.1 对应那个版本resampy,得知resampy0.2.2,于是乎就成了。
总结:要有自己的思路,gpt3.5只能帮助分析问题,不能解决问题,它很多时候只是重复某些语料,要利用它帮助分析问题,然后用新必应来进一步解决。
安装torch
下载编译好的文件
torch-1.3.0a0+de394b6-cp37-cp37m-linux_armv7l.whl 提取码:ioat torchvision-0.4.1a0+a263704-cp37-cp37m-linux_armv7l.whl 提取码:g0sz
安装Pytorch 安装必要的依赖包sudo apt-get install libopenblas-dev
安装numpy pip3 install numpy pyyaml(没有numpy的话也能成功编译,但是编译出来的PyTorch不支持numpy)
安装torch pip3 install torch-1.3.0a0+de394b6-cp37-cp37m-linux_armv7l.whl
安装torchvision pip3 install torchvision-0.4.1a0+a263704-cp37-cp37m-linux_armv7l.whl
安装一系列的包
pip3 install unidecode pip3 install pyopenjtalk pip3 install jamo pip3 install pypinyin pip3 install jieba cn2an
运行:报错
1
2
3
4
5
6
7
8
9
10
11
12
13
14
15
16
17
18
19
20
21
22
23
24
25
26
27
28
29
30
31
32
33
34
35
36
37
38
39
40
41
42
43
44
45
46
47
48
49
50
51
52
53
pygame 2.0.0 (SDL 2.0.9, python 3.7.3)
Hello from the pygame community. https://www.pygame.org/contribute.html
Traceback (most recent call last):
File "/usr/lib/python3.7/tarfile.py", line 187, in nti
    n = int(s.strip() or "0", 8)
ValueError: invalid literal for int() with base 8: 'ls\n_rebu'

During handling of the above exception, another exception occurred:

Traceback (most recent call last):
File "/usr/lib/python3.7/tarfile.py", line 2291, in next
    tarinfo = self.tarinfo.fromtarfile(self)
File "/usr/lib/python3.7/tarfile.py", line 1095, in fromtarfile
    obj = cls.frombuf(buf, tarfile.encoding, tarfile.errors)
File "/usr/lib/python3.7/tarfile.py", line 1037, in frombuf
    chksum = nti(buf[148:156])
File "/usr/lib/python3.7/tarfile.py", line 189, in nti
    raise InvalidHeaderError("invalid header")
tarfile.InvalidHeaderError: invalid header

During handling of the above exception, another exception occurred:

Traceback (most recent call last):
File "/home/pi/Desktop/sleep/lib/python3.7/site-packages/torch/serialization.py", line 595, in _load
    return legacy_load(f)
File "/home/pi/Desktop/sleep/lib/python3.7/site-packages/torch/serialization.py", line 506, in legacy_load
    with closing(tarfile.open(fileobj=f, mode='r:', format=tarfile.PAX_FORMAT)) as tar, \
File "/usr/lib/python3.7/tarfile.py", line 1593, in open
    return func(name, filemode, fileobj, **kwargs)
File "/usr/lib/python3.7/tarfile.py", line 1623, in taropen
    return cls(name, mode, fileobj, **kwargs)
File "/usr/lib/python3.7/tarfile.py", line 1486, in __init__
    self.firstmember = self.next()
File "/usr/lib/python3.7/tarfile.py", line 2303, in next
    raise ReadError(str(e))
tarfile.ReadError: invalid header

During handling of the above exception, another exception occurred:

Traceback (most recent call last):
File "speaking.py", line 130, in <module>
    speak("好的,主人!", 0)
File "speaking.py", line 125, in speak
    init_vits_model()
File "speaking.py", line 68, in init_vits_model
    model, optimizer, learning_rate, epochs = utils.load_checkpoint('/file/model/G_953000.pth', net_g_ms, None)
File "/home/pi/Desktop/sleep/wake/utils.py", line 23, in load_checkpoint
    checkpoint_dict = torch.load(checkpoint_path, map_location='cpu')
File "/home/pi/Desktop/sleep/lib/python3.7/site-packages/torch/serialization.py", line 426, in load
    return _load(f, map_location, pickle_module, **pickle_load_args)
File "/home/pi/Desktop/sleep/lib/python3.7/site-packages/torch/serialization.py", line 599, in _load
    raise RuntimeError("{} is a zip archive (did you mean to use torch.jit.load()?)".format(f.name))
RuntimeError: /file/model/G_953000.pth is a zip archive (did you mean to use torch.jit.load()?)
pytorch加载模型时出现…xxx.pth is a zip archive (did you mean to use torch.jit.load()?)
xxx.pth来自pytorch1.6或更高的版本。1.6之后pytorch默认使用zip文件格式来保存权重文件,导致这些权重文件无法直接被1.5及以下的pytorch加载。
1
2
3
4
5
6
7
8
9
10
11
12
13
14
15
16
17
18
19
20
解决办法1(失败,因为这个模型已经下载好的,这个解决办法是在训练时改一下代码使得生成的模型生成为飞压缩文件的格式)
解决方法:在新版本中将模型加载后,再存储为非压缩文件,再用老版本加载:
import torch
state_dict = torch.load("xxx.pth")	#xxx.pth或者xxx.pt就是你想改掉的权重文件
torch.save(state_dict, "xxx.pth", _use_new_zipfile_serialization=False)

解决办法2:升级pytorch为1.6
原torch:
pip list
...
torch              1.3.0a0+de394b6
torchvision        0.4.1a0+a263704
...

先卸载
pip uninstall torch torchvision

参照https://github.com/kevinchan04/Pytorch_ARM(失败,git下载太久了,或许可以想象改善网络的办法)

参照https://blog.csdn.net/qq_36622589/article/details/121941036(成功)
舒服
还是google牛逼
继续
1
2
3
4
5
6
7
8
9
10
11
12
13
14
15
16
17
18
19
20
21
22
23
24
25
26
27
28
29
30
31
32
33
34
35
36
37
38
39
40
报错
pygame 2.0.0 (SDL 2.0.9, python 3.7.3)
Hello from the pygame community. https://www.pygame.org/contribute.html
INFO:root:Loaded checkpoint '../file/model/G_953000.pth' (iteration 630)
DEBUG:asyncio:Using selector: EpollSelector
Building prefix dict from the default dictionary ...
DEBUG:jieba:Building prefix dict from the default dictionary ...
Dumping model to file cache /tmp/jieba.cache
DEBUG:jieba:Dumping model to file cache /tmp/jieba.cache
Loading model cost 3.370 seconds.
DEBUG:jieba:Loading model cost 3.370 seconds.
Prefix dict has been built successfully.
DEBUG:jieba:Prefix dict has been built successfully.
VITS :  生成成功! 生成耗时 25.27 s
speaking.py:30: RuntimeWarning: use mixer: libSDL2_mixer-2.0.so.0: cannot open shared object file: No such file or directory
(ImportError: libSDL2_mixer-2.0.so.0: cannot open shared object file: No such file or directory)
pygame.mixer.music.load(audio_file_name)
Traceback (most recent call last):
File "speaking.py", line 130, in <module>
    speak("好的,主人!", 0)
File "speaking.py", line 127, in speak
    asyncio.run(start(input_str,language))
File "/usr/lib/python3.7/asyncio/runners.py", line 43, in run
    return loop.run_until_complete(main)
File "/usr/lib/python3.7/asyncio/base_events.py", line 584, in run_until_complete
    return future.result()
File "speaking.py", line 121, in start
    play_audio("../file/tmp/output.wav")
File "speaking.py", line 30, in play_audio
    pygame.mixer.music.load(audio_file_name)
File "/home/pi/Desktop/sleep/lib/python3.7/site-packages/pygame/__init__.py", line 59, in __getattr__
    raise NotImplementedError(missing_msg)
NotImplementedError: mixer module not available (ImportError: libSDL2_mixer-2.0.so.0: cannot open shared object file: No such file or directory)

ImportError: libSDL2_mixer-2.0.so.0: cannot open shared object file: No such file or directory:这个错误表示缺少名为libSDL2_mixer-2.0.so.0的共享对象文件,导致无法加载pygame.mixer模块。该模块用于音频播放功能。

这个问题可能是由于缺少SDL2_mixer库或库文件路径配置错误引起的。您可以尝试以下解决方法:

- 确保已正确安装SDL2_mixer库。您可以通过运行sudo apt-get install libsdl2-mixer-2.0-0命令来安装它。(成功)
- 检查SDL2_mixer库文件的路径配置。您可以尝试设置LD_LIBRARY_PATH环境变量,将其指向包含SDL2_mixer库文件的目录。例如,运行export LD_LIBRARY_PATH=/usr/local/lib命令。(未尝试)
再次尝试,结果合成成功。但播放失败
很奇怪,树莓派上合成的语音,用pygame播放不了,说是格式不对,但传到电脑用pygame播放却可以,电脑上合成的语音,可以播放但用树莓派上的pygame却不能够播放。
挺烦的,当初都能做出来,现在却卡住了。
1
2
3
4
5
6
7
8
9
10
11
12
13
14
15
16
17
18
19
20
21
22
23
24
25
26
27
28
29
30
31
32
33
34
35
36
import pygame
import wave
import pyaudio

#推荐用,好
def play_audio(audio_file_name):
    # 初始化pygame
    pygame.init()
    # 设置音频文件
    pygame.mixer.music.load(audio_file_name)
    # 播放音频
    pygame.mixer.music.play()
    # 等待音频播放完毕
    while pygame.mixer.music.get_busy():
        pygame.time.Clock().tick(10)
    # 退出pygame
    pygame.quit()
#不推荐,差
def play_audio2():
    chunk = 1024
    wf = wave.open(r"/home/pi/Desktop/sleep/file/music/music1.wav", 'rb')
    p = pyaudio.PyAudio()
    stream = p.open(format=p.get_format_from_width(wf.getsampwidth()), channels=wf.getnchannels(),
                    rate=wf.getframerate(), output=True)

    data = wf.readframes(chunk)  # 读取数据
    print(data)
    while data != b'':  # 播放
        stream.write(data)
        data = wf.readframes(chunk)
        print('while循环中!')
        print(data)
    stream.stop_stream()  # 停止数据流
    stream.close()
    p.terminate()  # 关闭 PyAudio
接连尝试了多个播放方法后,发现效果都不佳,最终尝试改变wav的格式,最后成功播放合成的语音。
1
2
3
4
5
6
Traceback (most recent call last):
File "musicplay.py", line 77, in <module>
    play_audio('/home/pi/Desktop/sleep/file/music/music3.wav')
File "musicplay.py", line 9, in play_audio
    pygame.mixer.music.load(audio_file_name)
pygame.error: Unknown WAVE data format
报错的原因:使用pygame播放,结果wave格式未知
我以为整个文件都已经偏离了wave的范围
1
2
3
4
5
6
7
8
9
10
11
12
13
14
15
16
pygame 2.0.0 (SDL 2.0.9, python 3.7.3)
Hello from the pygame community. https://www.pygame.org/contribute.html
Traceback (most recent call last):
File "musicplay.py", line 41, in <module>
    play_audio2()
File "musicplay.py", line 24, in play_audio2
    wf = wave.open(r"/home/pi/Desktop/sleep/file/music/music3.wav", 'rb')
File "/usr/lib/python3.7/wave.py", line 510, in open
    return Wave_read(f)
File "/usr/lib/python3.7/wave.py", line 164, in __init__
    self.initfp(f)
File "/usr/lib/python3.7/wave.py", line 144, in initfp
    self._read_fmt_chunk(chunk)
File "/usr/lib/python3.7/wave.py", line 269, in _read_fmt_chunk
    raise Error('unknown format: %r' % (wFormatTag,))
wave.Error: unknown format: 3
然后使用pyaudio播放,错误提示表明 wave 模块在处理音频文件时遇到了未知的格式码 3。通常来说,WAV 文件的格式码为 1,表示 PCM 格式,而其他格式码则较为少见。
1
2
3
4
5
6
7
8
9
10
11
12
13
gpt建议:

检查文件格式:
确保 /home/pi/Desktop/sleep/file/music/music3.wav 文件是一个有效的 WAV 文件。你可以使用其他工具或库来检查文件格式,确保它是一个正确格式的 WAV 文件。

尝试其他 WAV 文件:
使用另一个 WAV 文件测试脚本,最好是一个你知道是 PCM 格式(格式码 1)的文件。这可以帮助确定问题是特定于文件还是更普遍的问题。

检查 WAV 文件属性:
使用工具或库检查有问题的 WAV 文件的属性,例如采样宽度、通道数和采样率。确保这些属性与 PyAudio 的期望相符。

转换文件格式:
如果文件格式有问题,考虑将其转换为标准的 PCM WAV 格式。你可以使用像 Audacity 这样的工具或 Pydub 这样的库来进行转换。
我意识到可以通过转换文件格式来解决问题
于是乎查看wav文件的格式
1
2
3
4
5
6
7
8
9
10
11
12
13
14
15
16
17
18
19
20
21
22
23
24
25
26
27
def check_audio(file_path):
    with wave.open(file_path, 'rb') as wf:
        print("采样宽度:", wf.getsampwidth())
        print("通道数:", wf.getnchannels())
        print("帧速率:", wf.getframerate())

check_audio("/home/pi/Desktop/sleep/file/music/music1.wav")#能正常播放
check_audio("/home/pi/Desktop/sleep/file/music/music3.wav")#不能正常播放

结果:
采样宽度: 2
通道数: 2
帧速率: 22050
Traceback (most recent call last):
File "musicplay.py", line 60, in <module>
    check_audio("/home/pi/Desktop/sleep/file/music/music3.wav")
File "musicplay.py", line 54, in check_audio
    with wave.open(file_path, 'rb') as wf:
File "/usr/lib/python3.7/wave.py", line 510, in open
    return Wave_read(f)
File "/usr/lib/python3.7/wave.py", line 164, in __init__
    self.initfp(f)
File "/usr/lib/python3.7/wave.py", line 144, in initfp
    self._read_fmt_chunk(chunk)
File "/usr/lib/python3.7/wave.py", line 269, in _read_fmt_chunk
    raise Error('unknown format: %r' % (wFormatTag,))
wave.Error: unknown format: 3
转换格式
1
2
3
4
5
6
7
8
9
10
11
12
13
14
from pydub import AudioSegment#安装:pip3 install pydub

def convert_audio_format(input_file, output_file, sample_width, channels):
    audio = AudioSegment.from_file(input_file)
    audio = audio.set_sample_width(sample_width)
    audio = audio.set_channels(channels)
    audio.export(output_file, format="wav")
# 替换文件路径和参数
input_file_path = "/home/pi/Desktop/sleep/file/music/music3.wav"
output_file_path = "/home/pi/Desktop/sleep/file/music/music3_converted.wav"
sample_width = 2  # 与 music1.wav 相同的采样宽度
channels = 2      # 与 music1.wav 相同的通道数
convert_audio_format(input_file_path, output_file_path, sample_width, channels)
check_audio(output_file_path)
查看结果
1
2
3
4
5
6
采样宽度: 2
通道数: 2
帧速率: 22050
采样宽度: 2
通道数: 2
帧速率: 22050
结果也可以播放。语音合成也就到此结束了,也就是多加了一个格式转化
百度语音合成
1
2
3
4
5
6
7
8
9
10
11
12
13
14
15
16
17
18
19
20
21
22
23
24
25
26
27
28
29
30
31
32
33
34
35
36
37
38
39
40
41
42
43
44
45
46
47
48
49
50
51
52
53
54
55
56
57
58
59
60
61
62
63
64
65
66
67
68
69
70
71
72
73
74
75
76
77
78
79
80
81
82
83
84
85
86
87
88
89
90
91
92
93
94
95
96
97
98
99
100
101
102
103
104
105
106
107
108
109
110
111
112
113
114
115
116
117
118
# coding=utf-8
import sys
import json
import pygame
#IS_PY3 标志用于检测是否在 Python 3 环境中运行。
#根据 Python 版本导入对应的 urllib 库。
IS_PY3 = sys.version_info.major == 3
if IS_PY3:
    from urllib.request import urlopen
    from urllib.request import Request
    from urllib.error import URLError
    from urllib.parse import urlencode
    from urllib.parse import quote_plus
API_KEY = ''
SECRET_KEY = ''
TEXT = ""
# 发音人选择, 基础音库:0为度小美,1为度小宇,3为度逍遥,4为度丫丫,
# 精品音库:5为度小娇,103为度米朵,106为度博文,110为度小童,111为度小萌,默认为度小美
PER = 4
# 语速,取值0-15,默认为5中语速
SPD = 5
# 音调,取值0-15,默认为5中语调
PIT = 5
# 音量,取值0-9,默认为5中音量
VOL = 5
# 下载的文件格式, 3:mp3(default) 4: pcm-16k 5: pcm-8k 6. wav
AUE = 6
FORMATS = {3: "mp3", 4: "pcm", 5: "pcm", 6: "wav"}
FORMAT = FORMATS[AUE]
CUID = "q3gH8c4olzE4v27UEHfEEYvbWpRaxIWQ"
TTS_URL = 'http://tsn.baidu.com/text2audio'
#定义一个自定义异常类 DemoError,用于处理可能的异常情况。
class DemoError(Exception):
    pass
"""  TOKEN start """
TOKEN_URL = 'http://aip.baidubce.com/oauth/2.0/token'
SCOPE = 'audio_tts_post'  # 有此scope表示有tts能力,没有请在网页里勾选
def play_audio(audio_file_name):
    # 初始化pygame
    pygame.init()
    # 设置音频文件
    pygame.mixer.music.load(audio_file_name)
    # 播放音频
    pygame.mixer.music.play()
    # 等待音频播放完毕
    while pygame.mixer.music.get_busy():
        pygame.time.Clock().tick(10)
    # 退出pygame
    pygame.quit()
def fetch_token():
    print("fetch token begin")
    params = {'grant_type': 'client_credentials',
              'client_id': API_KEY,
              'client_secret': SECRET_KEY}
    post_data = urlencode(params)
    if (IS_PY3):
        post_data = post_data.encode('utf-8')
    req = Request(TOKEN_URL, post_data)
    try:
        f = urlopen(req, timeout=5)
        result_str = f.read()
    except URLError as err:
        print('token http response http code : ' + str(err.code))
        result_str = err.read()
    if (IS_PY3):
        result_str = result_str.decode()

    print(result_str)
    result = json.loads(result_str)
    print(result)
    if ('access_token' in result.keys() and 'scope' in result.keys()):
        if not SCOPE in result['scope'].split(' '):
            raise DemoError('scope is not correct')
        print('SUCCESS WITH TOKEN: %s ; EXPIRES IN SECONDS: %s' % (result['access_token'], result['expires_in']))
        return result['access_token']
    else:
        raise DemoError('MAYBE API_KEY or SECRET_KEY not correct: access_token or scope not found in token response')


"""  TOKEN end """

def speak2(TEXT):
    token = fetch_token()
    tex = quote_plus(TEXT)  # 此处TEXT需要两次urlencode
    print(tex)
    params = {'tok': token, 'tex': tex, 'per': PER, 'spd': SPD, 'pit': PIT, 'vol': VOL, 'aue': AUE, 'cuid': CUID,
              'lan': 'zh', 'ctp': 1}  # lan ctp 固定参数

    data = urlencode(params)
    print('test on Web Browser' + TTS_URL + '?' + data)

    req = Request(TTS_URL, data.encode('utf-8'))
    has_error = False
    try:
        f = urlopen(req)
        result_str = f.read()

        headers = dict((name.lower(), value) for name, value in f.headers.items())

        has_error = ('content-type' not in headers.keys() or headers['content-type'].find('audio/') < 0)
    except  URLError as err:
        print('asr http response http code : ' + str(err.code))
        result_str = err.read()
        has_error = True
    save_file = "../file/tmp/output2.txt" if has_error else '../file/tmp/output2.' + FORMAT
#    save_file = "error.txt" if has_error else 'result.' + FORMAT
    with open(save_file, 'wb') as of:
        of.write(result_str)
    if has_error:
        if (IS_PY3):
            result_str = str(result_str, 'utf-8')
        print("tts api  error:" + result_str)

    print("result saved as :" + save_file)

    play_audio("../file/tmp/output2.wav")

#speak2("你好,缓缓")
可以使用,效果比使用模型好,感觉使用VITS模型好像有点傻逼了,但好歹也是多了一个喜欢的音色的选择