
语音唤醒
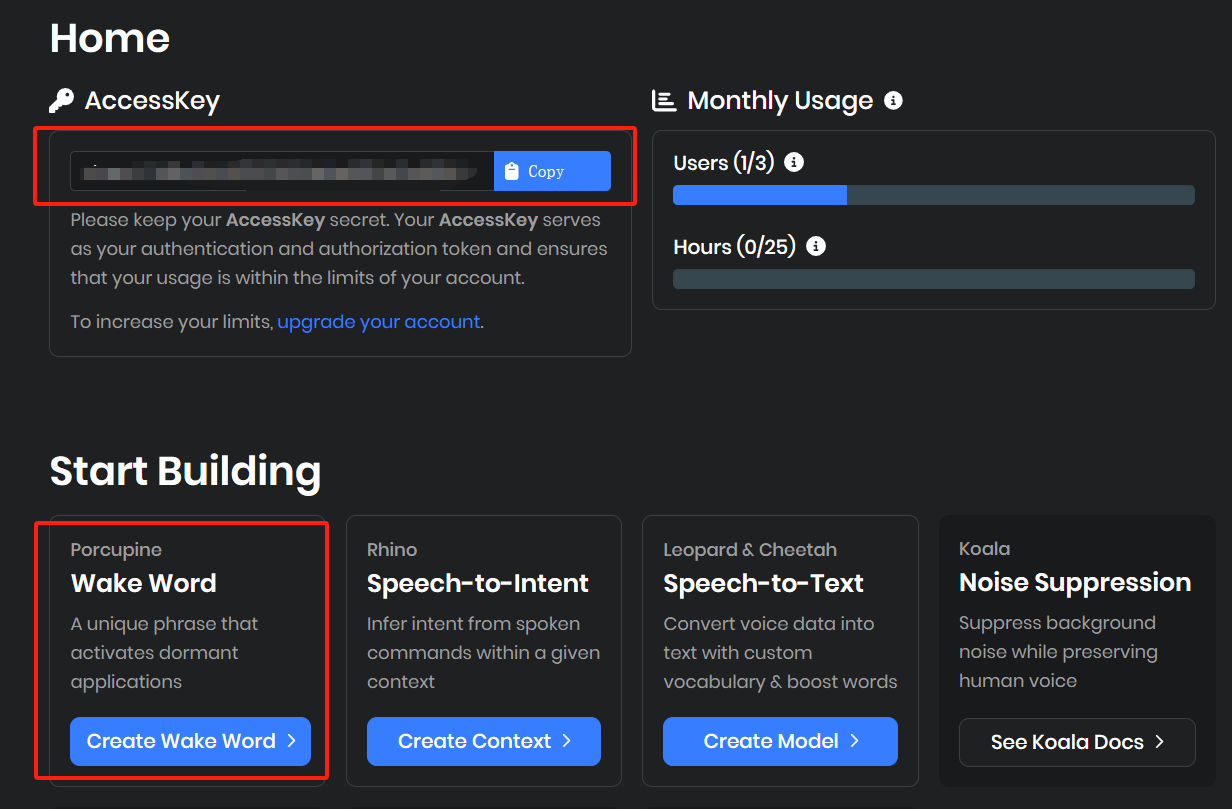
国外主站https://picovoice.ai/ 注册后获取porcupine_key,训练提示词模型,下载ppn模型。
1
2
3
4
5
6
7
8
9
10
11
12
13
14
15
16
17
18
19
20
21
22
23
24
25
26
27
28
29
30
31
32
33
34
35
36
37
38
39
40
41
42
43
44
45
46
import pvporcupine
import pyaudio
import struct
import pyttsx3
import keyboard

porcupine_key = "xxxxx"
porcupine_model = 'xxxxxx'

def keyword_wake_up():
    porcupine = pvporcupine.create(access_key=porcupine_key, keyword_paths=[porcupine_model])
    # 开启录音流
    kws_audio = pyaudio.PyAudio()
    audio_stream = kws_audio.open(
        rate=porcupine.sample_rate,
        channels=1,
        format=pyaudio.paInt16,
        input=True,
        frames_per_buffer=porcupine.frame_length,
        input_device_index=None,
    )
    print("等待唤醒中,唤醒词:hello chat...")
    while True:
        pcm = audio_stream.read(porcupine.frame_length)
        _pcm = struct.unpack_from("h" * porcupine.frame_length, pcm)
        keyword_index = porcupine.process(_pcm)
        if keyword_index >= 0:
            print("唤醒了捏!")
            engine = pyttsx3.init()
            engine.say("唤醒了捏")
            engine.runAndWait()
            break
    audio_stream.stop_stream()
    audio_stream.close()
    porcupine.delete()
    kws_audio.terminate()

def press_key_wake_up():
    print("按任意键唤醒...")
    keyboard.read_event()
    print("唤醒了捏!")
    engine = pyttsx3.init()
    engine.say("唤醒了捏")
    engine.runAndWait()

keyword_wake_up()
语音识别
调用腾讯云的语音识别api,使用工作台的两个参数
1
2
3
4
5
6
7
8
9
10
11
12
13
14
15
16
17
18
19
20
21
22
23
24
25
26
27
28
29
30
31
32
33
34
35
36
37
38
39
40
41
42
43
44
45
46
47
48
49
50
51
52
53
54
55
56
57
58
59
60
61
62
63
64
65
66
67
68
69
70
71
72
73
74
75
76
77
78
79
80
81
82
83
84
85
86
87
88
89
90
91
92
93
94
95
96
97
98
99
100
101
102
103
104
105
106
107
108
109
110
111
112
113
114
115
116
117
# 腾讯云asr,输入base64编码的wav音频,输出text,此函数需异步调用,以节约请求事件
from tencentcloud.common import credential
from tencentcloud.common.profile.client_profile import ClientProfile
from tencentcloud.common.profile.http_profile import HttpProfile
from tencentcloud.asr.v20190614 import asr_client, models
import struct
import pvporcupine
import pyaudio
import asyncio
import json
import base64
import io
import wave
import pvcobra

#
porcupine_key = "xxxxxxxxxxx"
porcupine_model = 'xxxxxxxxx.ppn'


def sound_record():
    porcupine = pvporcupine.create(access_key=porcupine_key, keyword_paths=[porcupine_model])
    cobra = pvcobra.create(access_key=porcupine_key)
    # 开启录音流
    kws_audio = pyaudio.PyAudio()
    audio_stream = kws_audio.open(
        rate=porcupine.sample_rate,
        channels=1,
        format=pyaudio.paInt16,
        input=True,
        frames_per_buffer=porcupine.frame_length,
        input_device_index=None,
    )
    # 开始录音
    frames = []
    print("开始录音...")
    silence_count = 0
    is_voiced = 1
    while is_voiced:
        pcm = audio_stream.read(porcupine.frame_length)
        _pcm = struct.unpack_from("h" * porcupine.frame_length, pcm)
        is_voiced = cobra.process(_pcm)
        silence_count = 0 if is_voiced > 0.5 else silence_count  + 1
        if silence_count <= 50:
            if silence_count < 10:
                frames.append(pcm)
        else:
            break
    audio_stream.stop_stream()
    audio_stream.close()
    porcupine.delete()
    kws_audio.terminate()

    # 将数据帧编码为base64编码的WAV格式
    with io.BytesIO() as wav_buffer:
        with wave.open(wav_buffer, 'wb') as wf:
            wf.setnchannels(1)
            wf.setsampwidth(kws_audio.get_sample_size(pyaudio.paInt16))
            wf.setframerate(porcupine.sample_rate)
            wf.writeframes(b''.join(frames))
        wav_base64 = base64.b64encode(
            wav_buffer.getvalue()).decode('utf-8')
        #保存的路径
        output_file = 'recorded_audio.wav'  # 替换成你想要保存的路径
        with open(output_file, 'wb') as output_file:
            output_file.write(base64.b64decode(wav_base64))
        print(f"录音已保存")
    return wav_base64


# 腾讯云api的ID和key,用于语音识别
tencent_Id = "xxxxxxx"
tencent_key = "xxxxxxxxx"

async def tencent_asr(wav_base64):
    cred = credential.Credential(tencent_Id, tencent_key)
    # 实例化一个http选项,可选的,没有特殊需求可以跳过
    httpProfile = HttpProfile()
    httpProfile.endpoint = "asr.ap-guangzhou.tencentcloudapi.com"

    # 实例化一个client选项,可选的,没有特殊需求可以跳过
    clientProfile = ClientProfile()
    clientProfile.httpProfile = httpProfile
    # 实例化要请求产品的client对象,clientProfile是可选的
    client = asr_client.AsrClient(cred, "", clientProfile)
    # 实例化一个请求对象,每个接口都会对应一个request对象
    req = models.SentenceRecognitionRequest()
    params = {
        "ProjectId": 0,
        "SubServiceType": 2,
        "EngSerViceType": "16k_zh",
        "SourceType": 1,
        "VoiceFormat": "wav",
        "UsrAudioKey": "0",
        "Data": wav_base64,  # 音频二进制数据
        "DataLen": len(wav_base64)  # 音频长度
    }
    req.from_json_string(json.dumps(params))
    response = await asyncio.to_thread(client.SentenceRecognition, req)

    if response.Result == "":
        print("你什么都没说~")
    else:
        print("你:" + response.Result)
    return response.Result


def listen(model: str = "tencent"):
    audio_data = sound_record()
    if model == "tencent":
        user_words = asyncio.run(tencent_asr(audio_data))
        return user_words
    #elif model == "whisper":
        #user_words = whisper_asr(audio_data)
        #return user_words

listen()